本文为尚硅谷Flume课程随堂笔记
一、 项目介绍
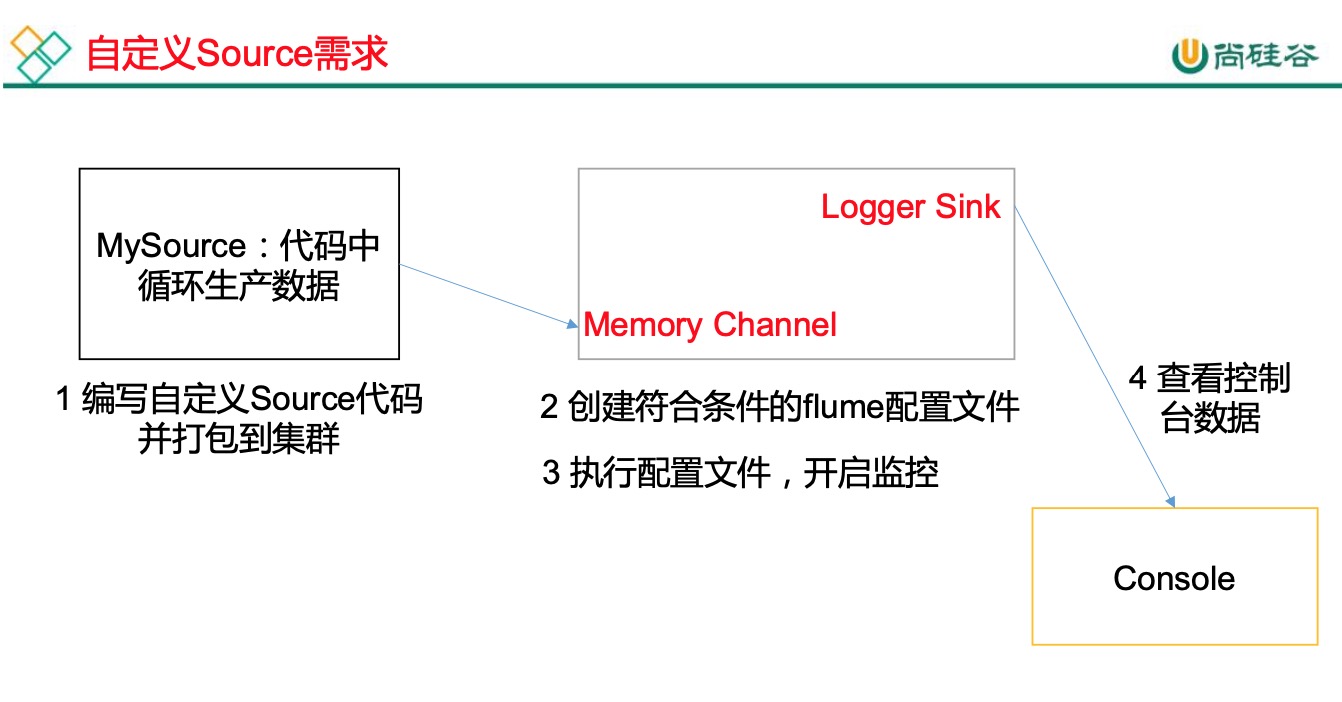
在本案例中使用flume接收数据,并给每条数据添加前缀,输出到控制台。前缀可从flume配置文件中配置。
整个架构大致如下图:
官方也提供了自定义source的接口:
https://flume.apache.org/FlumeDeveloperGuide.html#source 根据官方说明自定义MySource需要继承AbstractSource类并实现Configurable和PollableSource接口。
二、 构建自定义Source代码
1.创建maven项目
1 | <dependency> |
2. 构建自定义类
首先创建自定义类继承AbstractSource类并实现Configurable和PollableSource接口。
具体代码如下:1
2
3
4
5
6
7
8
9
10
11
12
13
14
15
16
17
18
19
20
21
22
23
24
25
26
27
28
29
30
31
32
33
34
35
36
37
38
39
40
41
42
43
44
45
46
47
48
49
50
51
52
53
54
55
56
57
58
59
60
61
62
63
64
65
66
67
68
69
70
71
72import org.apache.flume.Context;
import org.apache.flume.Event;
import org.apache.flume.EventDeliveryException;
import org.apache.flume.PollableSource;
import org.apache.flume.conf.Configurable;
import org.apache.flume.event.SimpleEvent;
import org.apache.flume.source.AbstractSource;
/**
* @author suiwo
* @title MySource
* @date 2020/6/2 13:19
* @description //todo
*/
public class MySource extends AbstractSource implements Configurable, PollableSource {
private String prefix;
private String subfix;
public void configure(Context context) {
prefix = context.getString("prefix");
subfix = context.getString("sub","noSubfix");
}
/**
* 1. 接收数据(for循环造数据)
* 2. 封装为时间
* 3. 将时间传给Channel
*/
public Status process() throws EventDeliveryException {
Status status = null;
// 1. 接受数据
try {
for (int i = 0; i < 5; i++) {
// 2. 构建事件对象
SimpleEvent event = new SimpleEvent();
// 3. 给事件设置值
event.setBody((prefix + "--" + i + "--" + subfix).getBytes());
// 4. 将时间传递给Channel
getChannelProcessor().processEvent(event);
status = Status.READY;
}
} catch (Exception e) {
status = Status.BACKOFF;
e.printStackTrace();
}
try {
Thread.sleep(2000);
} catch (InterruptedException e) {
e.printStackTrace();
}
return status;
}
public long getBackOffSleepIncrement() {
return 0;
}
public long getMaxBackOffSleepInterval() {
return 0;
}
}
3. maven打包
将项目打包,并将项目放至flume的lib目录下
三、编写Flume相关配置
1. 编写my-source.conf
1 | # Name the components on this agent |
四、 启动测试
执行下面指令启动服务1
bin/flume-ng agent -c conf -f job/my-source.conf -n a1 -Dflume.root.logger=INFO,console
此时可以发现prefix参数获取成功,subfix因为配置文件中未配置,所以使用默认值